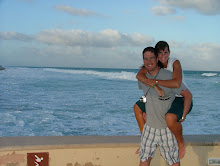
First off, the night before I set out to Logan to run the 192 mile relay race, my friends/old roomies from college had a dinner with our little families. It was the first time all six of us had been able to get together for probably over 5 years, so it was a lot of fun.
The Penthouse Pimps of 2113. {Yes, that is what we called ourselves.}

The Pimps and our chilluns. Sadly, Logan is not in this picture. Jeremy had taken him home to go to bed. Very sad. :(

Chocolate Ganache
3/4 C Cream
2 T real butter, melted
8 oz semi-sweet or dark chocolate, chopped
2 T real butter, melted
8 oz semi-sweet or dark chocolate, chopped
Place chocolate in a bowl. Pour melted butter over it. Place cream in microwave-safe bowl and microwave for about 2 minutes- it needs to be at a simmer. Immediately pour over chocolate and cover with plastic wrap. Let sit for about 3 minutes and then stir until smooth. Let it cool until it’s a good spreading consistency and then spread on top of filled cupcakes.
I made the ganache to top some Devil's Food Cupcakes from scratch, which were also really good. I had tried filling the cupcakes with a vanilla creme filling, but I did something wrong with that cream and it didn't really work. I'm going to have to try it again...
Devil’s Food Cupcakes
1 C Flour
1/4 C unsweetened cocoa powder
3/4 t baking soda
1/4 t salt
1/2 C granulated sugar
1/2 C firmly packed brown sugar
4 T unsalted butter at room temperature
1 large egg, at room temperature
1 t vanilla extract
1/2 C luke warm water
1/4 C buttermilk
1/4 C unsweetened cocoa powder
3/4 t baking soda
1/4 t salt
1/2 C granulated sugar
1/2 C firmly packed brown sugar
4 T unsalted butter at room temperature
1 large egg, at room temperature
1 t vanilla extract
1/2 C luke warm water
1/4 C buttermilk
1. Position rack in the middle of oven and preheat to 350. Line a standard 12 cup muffin tin with liners. Sift together the flour, cocoa powder, baking soda, and salt into a bowl. I know lots of people skip sifting, but in some recipes it’s really important. This is one of them, so just pop it in a strainer and shake all those lumps out.
2. In another bowl, with an electric mixer on medium-high speed, beat the granulated sugar, brown sugar, and butter together until light and fluffy, 2-3 minutes. Add the egg and vanilla and beat until combined.
3. Add the flour mixture in 3 additions, alternating with the water and buttermilk, beating on low speed until just combined. Scrape down the sides of the bowl as needed. Beat on medium high speed just until no traces of flour remain, about 30 seconds; do not over beat.
4. Divide the batter evenly among muffin cups- use a cookie scoop for even filling. Bake until a toothpick inserted into the center comes out clean. Anywhere from 15-20 minutes. Mine usually only take about 15- don’t over bake! Let the cupcakes cool in the pan on a wire rack for 5 minutes and then remove them and let them cool.
4. Divide the batter evenly among muffin cups- use a cookie scoop for even filling. Bake until a toothpick inserted into the center comes out clean. Anywhere from 15-20 minutes. Mine usually only take about 15- don’t over bake! Let the cupcakes cool in the pan on a wire rack for 5 minutes and then remove them and let them cool.
The other cupcakes I made were from a Peanut Butter Silk Cake recipe that I turned into cupcakes (instead of frosting layers I filled the cupcakes) which I found on bettycrocker.com. These were a HUGE hit. They were a Yellow Peanut Butter Cake filled with a peanut butter whipped cream filling and topped with chocolate frosting. Oh. My. Goodness. {My friend thought it was a good idea to tell me the nutrition information after I sent her the recipe. Don't look. Just enjoy. They're fat free anyway. :D}
Peanut Butter Silk Cake/Cupcakes
1
box Betty Crocker® SuperMoist® yellow cake mix
1 1/4
cups water
1/2
cup creamy peanut butter
1/3
cup vegetable oil
3
eggs
1/4
cup butter or margarine
1/4
cup packed brown sugar
1
cup whipping cream
1/2
cup creamy peanut butter
1
container (1 lb) Betty Crocker® Rich & Creamy chocolate frosting
1
cup chopped peanuts, if desired
Heat oven to 350°F (or 325°F for dark or nonstick pans). Generously grease bottoms only of 2 (8- or 9-inch) round cake pans with shortening or cooking spray.
1. In large bowl, beat cake mix, water, 1/2 cup peanut butter, the oil and eggs with electric mixer on low speed 30 seconds. Beat on medium speed 2 minutes, scraping bowl occasionally. Pour into pans.
2. Bake 30 to 35 minutes or until toothpick inserted in center comes out clean. Cool 10 minutes. Run knife around sides of pans to loosen cakes; remove from pans to cooling rack. Cool completely, about 1 hour.
3. In 2-quart saucepan, melt butter over medium heat; stir in brown sugar. Heat to boiling; boil and stir 1 minute. Remove from heat. Refrigerate 10 minutes.
4. In chilled medium bowl, beat whipping cream on high speed until soft peaks form; set aside. In another medium bowl, beat 1/2 cup peanut butter and the brown sugar mixture on medium speed until smooth and creamy. Add whipped cream to peanut butter mixture; beat on medium speed until mixture is smooth and creamy.
5. Split each cake layer horizontally to make 2 layers. Fill each layer with about 2/3 cup peanut butter mixture to within 1/2 inch of edge. Frost side and top of cake with frosting. Press peanuts onto frosting on side of cake, if desired. Store covered in refrigerator.
***To fill cupcakes, stuff pastry bag with desired frosting and tip {or just get a ziploc bag and cut bottom of one corner}. Insert tip into middle of cupcake and squeeze bag while pulling away from cupcake. EASY, EASY, EASY, and yet it makes you look like a bona fide baker!
I'll admit, during night two of working on these cupcakes, combined with the ridiculous amount stress I had over running the Ragnar Relay, I kept asking myself why I had to make my life so difficult and why couldn't I have just made an easy Oreo Ice Cream Dessert or something? But I guess I'm glad I made them, because they are good and I would have had no other reason to make them. {By the way, the reason I made two is because there are some people who don't like chocolate and some who don't like peanut butter, not because I am that crazy.}
Okay, the other two recipes I want to share are also from Our Best Bites. Can you tell I am in love with this blog? The first is a Streusel Topped Blueberry Muffin recipe which I made for Jeremy for Father's Day, then again last weekend. SOOOOOOOO YUMMY. The second is a Guiltless Alfredo Sauce. No heavy cream but still very creamy and AMAZING.
Streusel-Topped Blueberry Muffins
1 3/4 c. all-purpose flour
2 3/4 tsp. baking powder
3/4 tsp. table salt
1/2 c. sugar
2 tsp. grated orange or lemon peel
1 large egg
3/4 c. buttermilk
1/3 c. canola oil
1 c. fresh or frozen blueberries
1 Tbsp. flour
1 Tbsp. sugar
Streusel Topping
1/4 c. sugar
1/4 c. sugar
2 1/2 Tbsp. flour
1/2 tsp. cinnamon
1 1/2 Tbsp. butter
1. Preheat oven to 400 degrees. Lightly spoon the flour into measuring cups and level ith with a knife and combine it in a large bowl with the baking powder, salt, sugar, and citrus peel. Make a well in the center of the mixture. In a smaller bowl, whisk together the egg, buttermilk, and oil. Add to the dry ingredients, stirring just until moistened.
2. In a small bowl, combine the remaining flour and sugar and then toss the blueberries in this mixture until they are well-coated. Gently fold the blueberry mixture into the batter. Spoon the batter into lined muffin tins, filling 2/3 full.
3. To make the streusel topping, combine the 1/4 c. sugar, 2 1/2 Tbsp. flour, and cinnamon. Cut in the butter with a pastry cutter or two butter knives until the mixture is crumbly. Sprinkle over the batter and bake for 18 minutes or until the tops are golden and a toothpick inserted into the center of one of the muffins comes out clean. Remove from oven and allow to cool in the pan for 5 minutes and then transfer to a cooling rack.
***I used more blueberries than called for; a cup was just NOT enough. And don't be afraid to PILE on the streusel on. It is MUY BUENO!
Guiltless Alfredo Sauce
2 C low-fat milk
1/3 C (3 oz) low fat cream cheese
2 T flour
1 t salt
1 T butter
3 garlic cloves
1 C freshly grated Parmesan cheese
1/3 C (3 oz) low fat cream cheese
2 T flour
1 t salt
1 T butter
3 garlic cloves
1 C freshly grated Parmesan cheese
1. Toss the milk, cream cheese, flour, and salt in a blender. Process until smooth and set aside.
2. In a non-stick sauce pan, melt butter on med-high heat and add garlic. Stand above the pan (but not close enough to scald your face) and inhale. Ahhh…butter and garlic. Okay, now get cooking again. Let the garlic saute for about 30 seconds, you don’t want to burn it. It should be nice and bubbly.
3. Then add milk mixture to the pan. Stir constantly for about 3 or 4 minutes or until it just comes to a simmer. Keep stirring and let it cook for a few minutes more. It should be much thicker now.
4. When it’s nice and thickened, remove the pan from the heat. Add the cheese, stir it up and then cover immediately. Let stand for at least 10 minutes before using. It will continue to thicken upon standing. Also, if you have leftovers in the fridge, the sauce will thicken almost into a solid. Just re-heat and add a little milk and it will be back to normal again.